
I’ve always been fascinated by LED Matrix displays, when I owned my first home I had one hanging in the living room. It didn’t do much aside from scroll a few random words that had taken FAR too long to program in with a DOS based bit of software. That love of LED Matrix displays was sparked again recently by UK Departure Boards – go check them out. Now honestly, I’m not a train nerd, but I just love the mechanism of them, the live feed of information, constantly updating and adapting. I’d really love one of their boards, but I wanted the biggest size – but that is also the biggest money, and well, I can’t really afford it.
Now also, we’re a household of plane lovers – we live nearish to Stansted and near the base for the Air Ambulance – meaning there’s a steady flow of flights overhead. Quite often I’ll fire open the Flight Radar app to see what’s flying overhead, and then get annoyed at the adverts in the app because I don’t want to pay for the full one! There are commercial displays you can buy that show flights overhead on an LED Matrix, but I also discovered, you can BUILD them too – so I did – I found Colin Waddell‘s GitHub and made a Flight Tracker. There’s a video on my YouTube about it all – it’s below too..
But if you know me at all, you’ll know I bloody love Theme Parks too, so I pondered if I could maybe make an LED matrix display that is theme park based. I’d seen some queue tracker boards that tell you about Disney parks, but I’ll be honest – I’m not really a Disney park guy – they just don’t tickle my pickle. Not sure why! I just thought it would be awesome to build a universal (not Universal!) theme park queue board that could display queues from any major theme park around the world.
So one afternoon, I tried to build one. I’d sort of absorbed a lot of stuff about how they work through building the flight tracker – and had a LOAD of spare parts knocking around. My idea was to make something that *I* could use and hopefully ANYONE could (with a bit of technical nouse to them). Within a few hours of vibe coding in Python, and using my 30ish years of HTML knowledge – I had a start.. this was it.
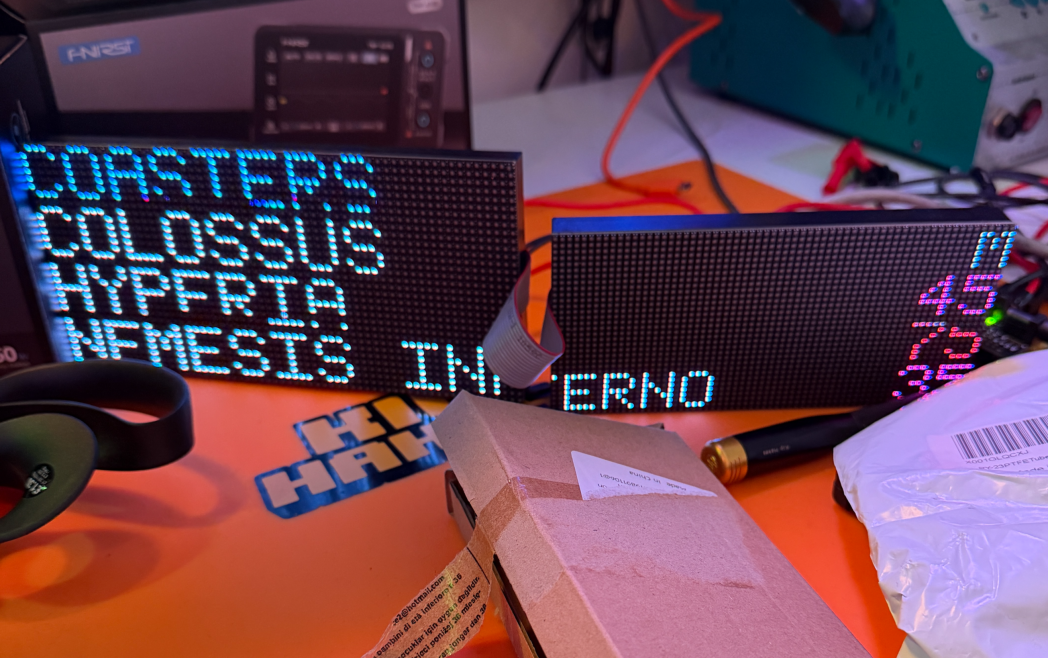
Some queue times from Thorpe Park split over two Matrix boards showing live queue times from Staines BEST theme park. I didn’t have two matching panels, the colours were fooked because they used different RGB settings. But it worked.
Since then, I’ve slowly been building something actually useable. You can choose up to three theme parks from around the world, and it will fetch live queue times, and refresh them every five minutes. The software *can* show park logos – however, because I don’t want to be sued by Disney / Merlin / Universal it won’t ship with those (although I’m gonna work out a way for the user to upload their own – hopefully!)
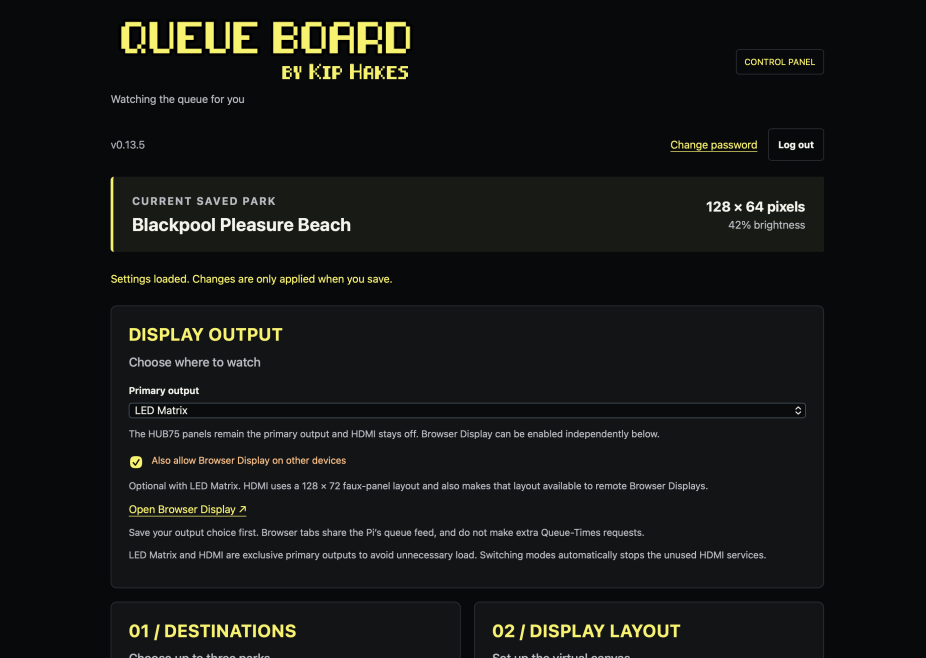
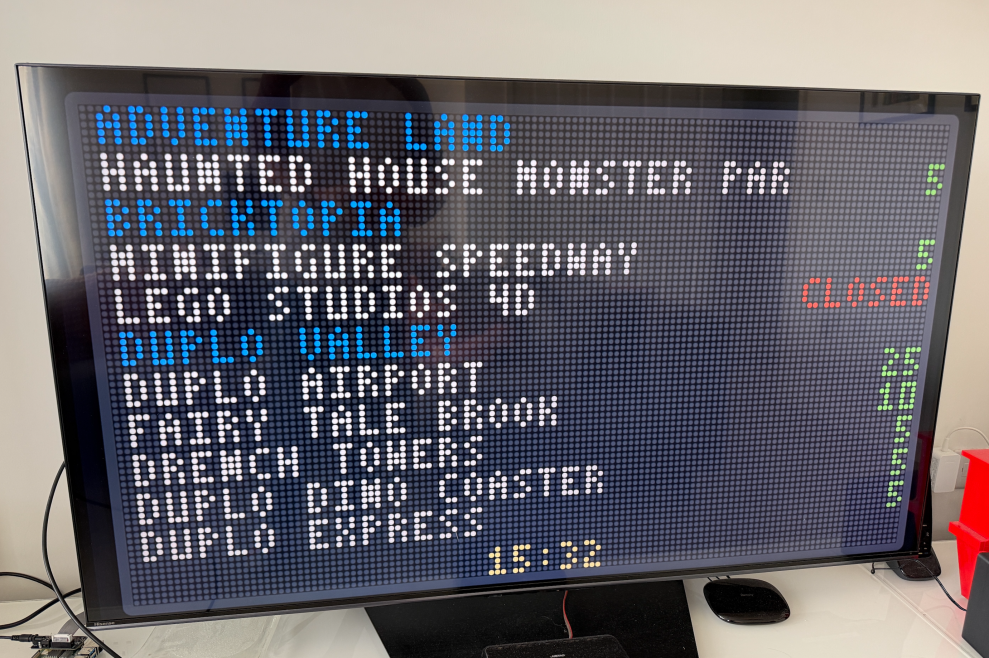
As well as that, it can show the current weather at the park, the park time, and also the local time as well. Now the project started out as a way of displaying all these things on an LED Matrix, but I understand not everyone might WANT to build an LED Matrix – so I adapted it for multiple display options. It can use the Raspberry Pi’s (that’s what it runs on – I’ll get to that) HDMI output, and can output to any HDMI TV or display and show a dot matrix style display on that. The HDMI mode can also use the TV / Display’s CEC protocol (some manufacturers call it different things) whereby the Pi can turn on the TV when the software loads, and put it into standby when the Queue Board is in ‘night mode’.
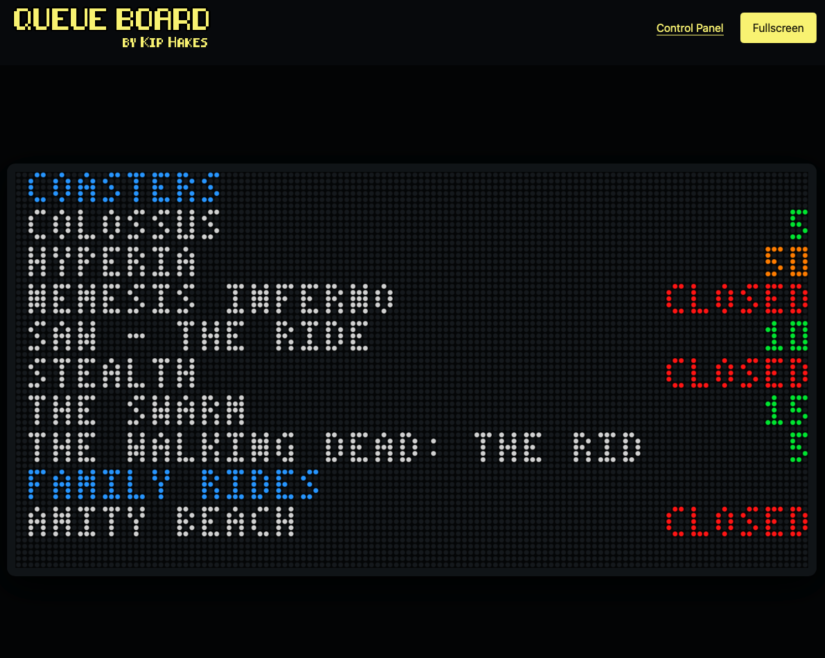
It also has a ‘browser’ mode too, so you can navigate to the local IP address it has, and you’ll see a web page (that can be made full-screen) showing an LED Matrix style display too.
For those who DO want it showing on an LED Matrix, I’ve made it so it will work on either –
- One 32 x 64 LED Matrix boards
- Two 32 x 64 LED Matrix boards (either side by side to make 32 x 128 – or stacked to make 64 x 64)
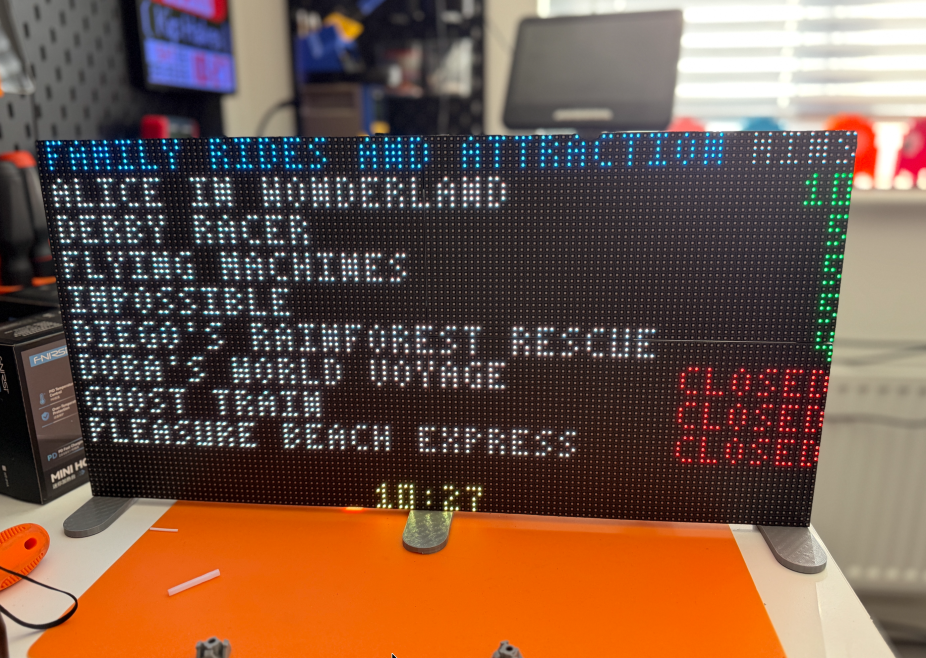
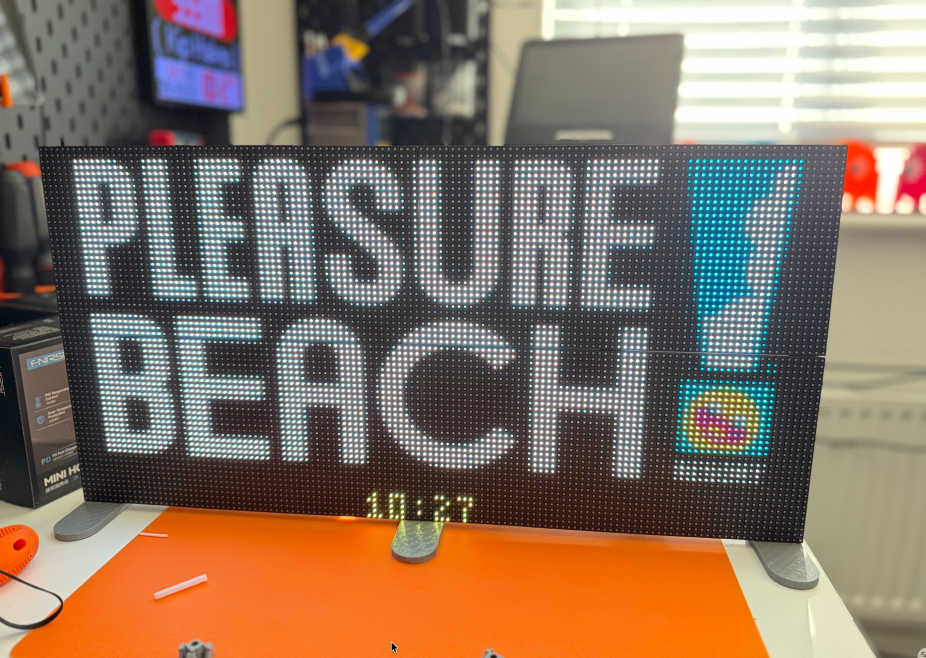
- Four 32 x 64 LED Matrix boards in a 2 x 2 formation making a 64 x 128 display (that’s shown below)
Once the software is installed all the settings are controlled via a web interface, you can set what display to use, the layout, the font size, it’s all pretty simple and user-friendly. I’ve even added a ‘photography mode’ to pause the displays so you can take a photo without it scrolling and show off your new toy.
What do I need to run the Theme Park Queue Board?
Great question! So I’ve fully tested it on the Raspberry Pi 3 and Raspberry Pi 4 – for those of you who don’t know what they are, they are TEENY computers, that are essentially just a circuit board. They don’t have hard drives, the software is read off a MicroSD card, they have HDMI outputs (well the Pi 3 has an HDMI output and the Pi 4 has Micro HDMI outputs). They also have WiFi, Bluetooth, Ethernet connection and USB Ports. I have tested the software on the dirt cheap Raspberry Pi Zero WH, and it JUST works, but only really with the browser mode, the HDMI output MAY work – I’ve not tested it – but it was too much running the LED Matrix – so probably not worth getting. The Pi Zero 2 WH *might* work, but I don’t have the funds to buy one to test.
So if you wanted to run the Theme Park Queue Board you’d need at the minimum the following items – (these are affiliate links where I may earn commission if you purchase)
Run your Theme Park Queue Board on JUST an HDMI TV / Display or have the Web Browser Version
Raspberry Pi 3 – On Amazon – AliExpress – or just search eBay
OR Raspberry Pi 4 – On Amazon – AliExpress – or just search eBay
8Gb or Bigger MicroSD Card (try Sandisk or a known brand) – On Amazon
Raspberry Pi 3 Power Supply – On Amazon
OR Raspberry Pi 4 Power Supply – On Amazon
HDMI to HDMI Cable (2m?) if using a Pi 3 – On Amazon – AliExpress
Micro HDMI to HDMI Cable (2m?) if using a Pi 4 – On Amazon – AliExpress
Some kind of enclosure / case for your Pi 3 / Pi 4 – You can pick one you like! There’s LOADS!
Run your Theme Park Queue Board on an LED Matrix (Matrices) or HDMI TV / Display or have the Web Browser Version
Raspberry Pi 3 – On Amazon – AliExpress – or just search eBay
OR Raspberry Pi 4 – On Amazon – AliExpress – or just search eBay
8Gb or Bigger MicroSD Card (try Sandisk or a known brand) – On Amazon
5v Power Supply – at least 6A – On Amazon – AliExpress
Adafruit LED Matrix Bonnet – On Amazon – AliExpress
One or Two or Four 32 x 64 LED Matrix Panels – They have to be ’16S’ (that’s the refresh rate) – Pitch Size is up to you – the higher the ‘P’ number – the bigger the LEDs – Mine are P4 panels which are plenty for me. The Panels should come with the Data and Power Cables to hook them up to the LED Matrix Bonnet. Something like this on Amazon
Now at time of writing I don’t have a suitable enclosure that will house the Pi / Bonnet and hold together the screens – I’ve cobbled something together – but it’s not great. If you’re just running one Panel the case Colin Waddell designed could be a good starting point – or the one from my Flight Tracker video, but both of those need 3D Printing (use PCBWay if you don’t have a printer). But yeah, there’s no ‘official’ case yet, and won’t be for some time (maybe ever!)
How do I get the Theme Park Queue Board software?
Well before you get too excited, if you want to install and run the software on a Raspberry Pi, you will need a little bit of technical skill. Please watch the Flight Tracker video of mine to see how I install that, because the process is very similar. You have to use the Pi Imaging tool to put the Raspberry Pi Lite OS 64 Bit onto your MicroSD card. I will send you a Zip file that you have to use SSH (Terminal on a Mac or Powershell on a PC) to transfer to your Raspberry Pi, and run a few commands via SSH to get the software installed. Once that’s done, aside from upgrades – most of the config is done in the browser. It’s not rocket science, but equally, it’s not idiot-proof.
Also, whilst it feels like the software is actually pretty stable, it’s very very Alpha so isn’t guaranteed to be reliable – so could crash / stop working / eat your firstborn. Plus, whilst I will try and help with any issues, I can’t be tech support / hold your hand through installation – I have enough on my plate. It should be relatively straightforward, but I don’t know how it will perform for others, I will do my best to help, but I can’t promise much – if anything!
In the first instance, if you want to try it out, you need to be a Patreon of mine (at any paid tier) OR a YouTube Channel Member (at any paid tier). I’ve put a post up on both platforms explaining how you get in touch with me and get your name on the list. I will most likely be digitally signing the software sent out in this first phase with your details, so they will show on the credits screen each time that rolls around. This is a pet project of mine at the moment, and honestly, I’m not sure what the ‘full release’ of this will look like yet, so in the early stages I don’t want it being put ‘out there’ to the masses – and if it does end up that way, I’ll know exactly who did it from the digital signature.
Plus, I probably won’t EVER release it if that happens – I’m trusting you. Hence asking for a small (or big!) commitment to my Patreon / YouTube. If people aren’t knobheads I will most likely open source it – but I need to look more into that. I don’t ever see me ‘selling’ this so you can buy an ‘off the shelf’ one, but maybe one day? I don’t know – this is very early days and I don’t know what to do for the best!
So there you go, that’s roughly where I’m at today! Any comments, drop them below, or comment on Social Media! 🙂
