
When my 8 year old was a baby, Baby Monitors were simple things. You heard her crying and there were some ‘dancing lights’ to act as a visual warning of crying / noise, but that was about it. They’ve since started to get a bit more advanced; some with night lights, temperature monitoring, video feed and even movement (or lack of) sensor pads.
Being a geek, and thanks to generous parents, I was able to get something a little more, well, ‘geeky’. I had a look around a few of the available options (paying attention to the reviews on Amazon). I also watched a few videos of some working. We had ruled out something with a ‘movement’ sensor as a few family and friends had commented they can be tricky to set up and will often give you false alarms.
The one we opted for was the Summer Infant Baby Touch Digital Video Monitor![]() – at time of writing it’s £119.00, with an RRP of £159.00. We also picked up a new urbini omni plus travel system too, our second-hand one really wasn’t cutting it for J.
– at time of writing it’s £119.00, with an RRP of £159.00. We also picked up a new urbini omni plus travel system too, our second-hand one really wasn’t cutting it for J.
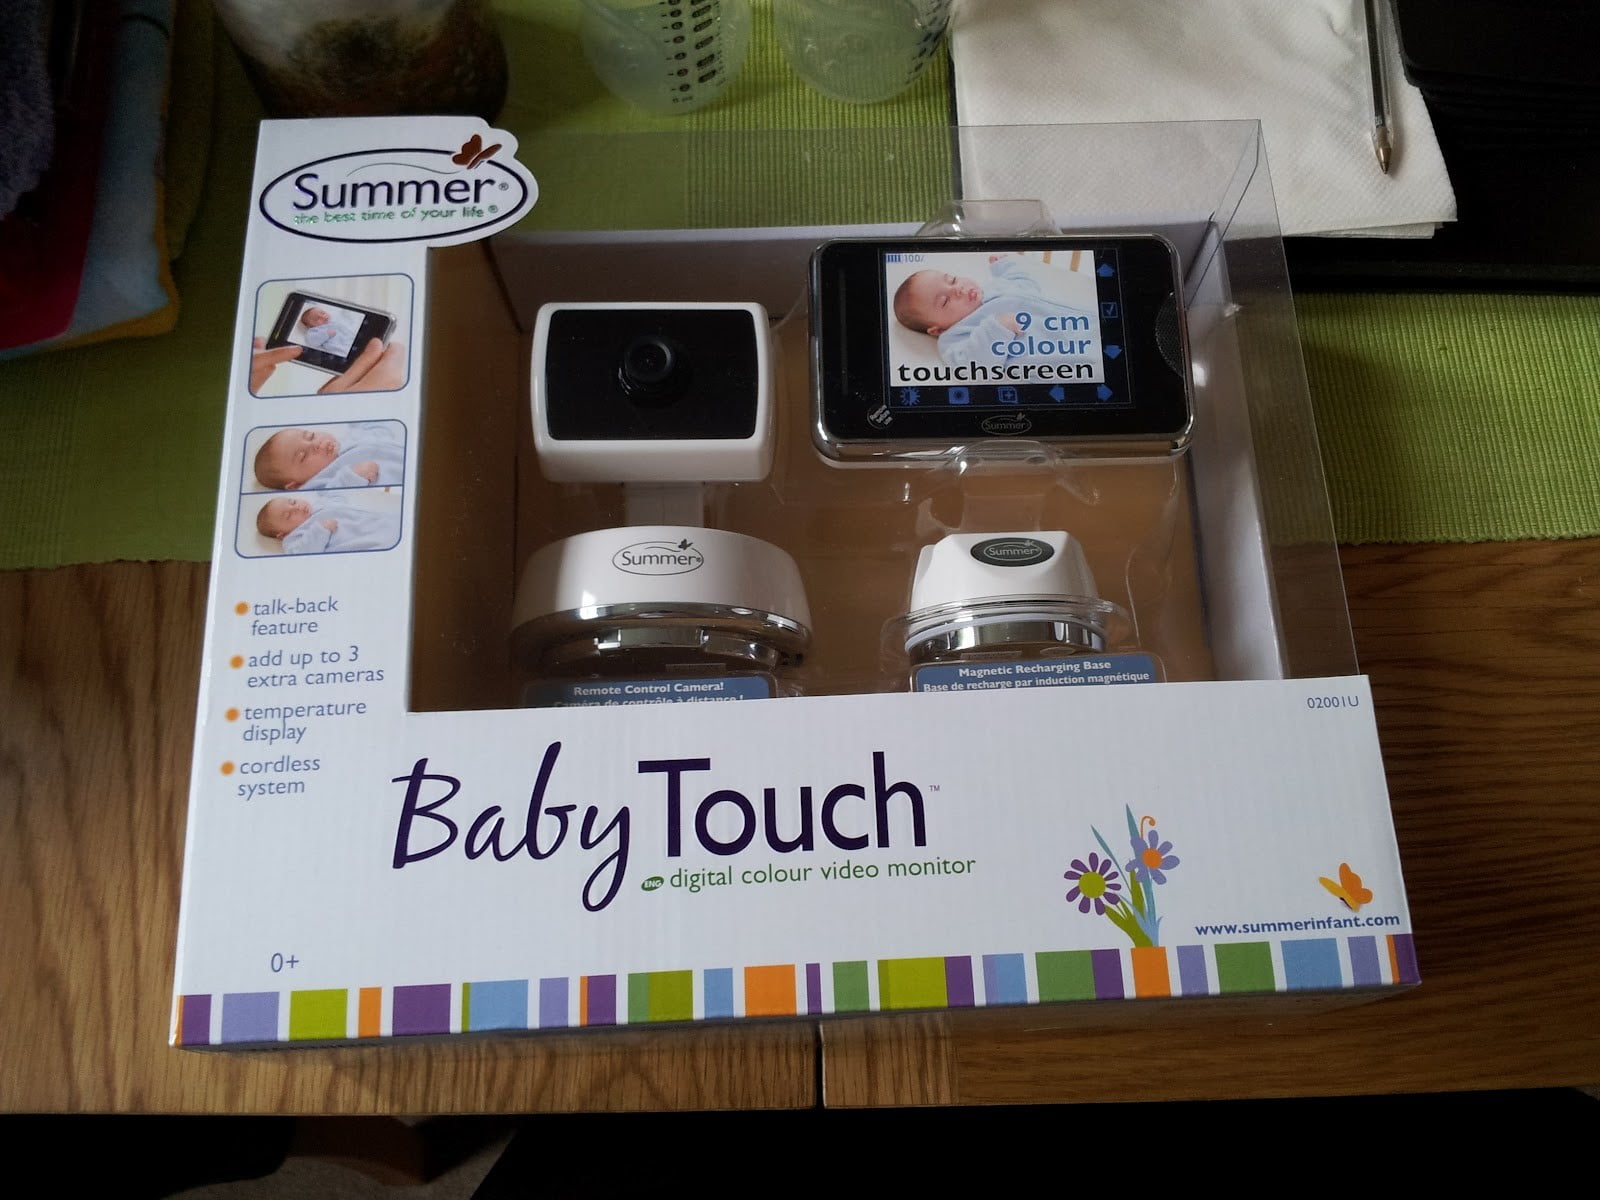

So on the right you have the camera unit, on the left is the ‘parent unit’ with the 9cm colour touchscreen and its magnetic charging station.
The parents unit is akin to a fatter iPhone 3G. It has a stand on the back and a range of buttons and connectors – here are some images.


The parents unit can view and control up to four cameras. It’s dead simple to get the supplied camera and unit ‘talking’ to each other; just switch on the camera, press and hold the ‘Code’ button on the back and on the parents unit, navigate to the ‘Add Camera’ section and it will automatically pair the two together. You only need to do this once.

Once the camera is paired up you can start to use the unit. You need to decide on the camera placement, but it comes with a screw and rawl plug to fix it to the wall (should you want to). It also comes with some stick-on cable clips to keep the cable tidy and safe. You can run the camera from the mains or from batteries with the battery pack. It’ll take 4xAA batteries. I’m not sure how long it would take for the camera to rinse the batteries – not long I suspect! The cables of the mains transformers are very long so you could mount it high on the wall fairly easily.
Once the camera is in the required position, you’re ready to use the unit. The touch screen has a home button on the side that will bring up the camera options, shown in the image below.

Across the top of the screen is the battery level and the temperature of the room. Along the bottom you have Brightness, Camera Options, Zoom, Pan Left and Pan Right. Along the right you have (from top to bottom) Pan Up, Select and Pan Down.
They are all pretty self-explanatory. The ‘Zoom’ is a digital zoom that zooms into the centre of the image. You can’t toggle the amount of zoom, it’s either zoomed in, or zoomed out.
On the left side of the screen is a power indicator. It’s green when the battery is full or on the mains and red when the battery is 20% or less. Just above this are the ‘dancing lights’ to show visually if any noise is being picked up by the camera, and on the right of the screen is a speaker so you can hear the baby.
On the left hand side of the unit you have an ‘AV Out’ socket which allows you to hook up the parents unit to your TV via the composite input (a yellow video and white audio plug). This is a nice idea, although the parent unit does stop working, so you can’t pan around or zoom. Also the picture quality is abysmal – really pixellated, although you can see what is going on, so it serves its purpose!

Under the AV Out you have a socket to plug the mains transformer into (if you’re not using the base).
Across the top of the unit you have the power button (that needs a press and hold to turn the unit on or off) and the ‘talk’ button where you can talk to your baby through the parents unit. Handy if you want to offer a ‘Shhhhhh’ or ‘GO THE F. TO SLEEP!!’ to your little ones. In the middle is a ‘Video On / Off’ toggle, the screen turns off after a few minutes (to save battery life) so hitting this button switches the screen on so you can see the baby. Then next to that you have the volume control for the speaker.
The parents unit has a battery similar to that found in a mobile phone. I wasn’t expecting the battery to be brilliant. I turned the unit on this morning at 11am with a full charge, and at time of writing (16.45) it’s at 25%. I’ve been playing with it a fair bit and had the screen on a lot, so it’s quite good really. You could probably have it downstairs in the evening on battery, and then pop it on to charge in your bedroom at night. The lifespan of the battery is 12-24 months and replacement ones can be purchased directly from Summer.
The quality of sound is pretty good from the camera to the to the parents unit and the microphone is very sensitive. Something to note is when you’re talking to the child through the parent unit, it is a little on the loud side, so unless you want your baby to wake up with a fright, it’s best to whisper through it. On the subject of sounds, the camera is very quiet when it rotates. You get a soft ‘whirring’, rather than an angry mechanical whine. It’s certainly not silent, but it won’t wake the baby.
The camera automatically switches to ‘Night Vision’ when there isn’t enough light in the room. I was actually amazed at how good the night vision is; the picture, although black and white, is very clear and you can still see perfectly well. The image below shows the camera in Night Vision. It really doesn’t do it justice, but the quality is very good.

Using a Wireless Video Monitor that works on 2.4Ghz I was slightly concerned that my WiFi reception would suffer, especially as I’d seen a few mentions of this on the Amazon review. No such problems here though. My router does pick the best ‘channel’ to use. Before I got this it was on channel 6, and now it’s on channel 11, so obviously there may have been some issue, but the router changed the channel automatically. I guess if you do have any issues with your WiFi reception, try changing the channel.
The range of the unit seems excellent too. We live in an older house with thick walls, but the Baby Touch works brilliantly. I even took the unit down the end of the garden and still had a crystal clear picture and sound was excellent!
Overall then the Summer Infant Baby Touch Digital Video Monitor is an excellent product. I’m really pleased with its overall performance, and I love the fact you can add four cameras in total. So you could have it watching multiple children, rooms, or areas. It was a cinch to set up and it feels like a good quality product. I’m not sure I like the old ‘iPhone’ metal band on the parent unit, but hey ho. The supplied manual isn’t the best I’ve ever seen, but to be honest the device is so easy to set up you shouldn’t need it! Some would argue that a video monitor is a ‘bit much’, but I think it’s reassuring to be able to see your little one at a touch of a button. The excellent automatic Night Vision gives you brilliant clarity even in the darkest of rooms. Taking all this into consideration, I wouldn’t hesitate to recommend this product!
For a full gallery of all the images I’ve photographed – click here.

i think the night vision mode looks like something out of Paranormal Activity. Just sayin'. :p
Pingback: The Blair Baby Project | kiphakes.comkiphakes.com