
4 – The Housing – ULANZI V2 Protective Housing Vlog Case Frame Cage Mount
There are several of these available, but I opted for the ULANZI V2 Protective Housing Vlog Case Frame Cage Mount. It holds the GoPro and the Microphone Adaptor together really nicely, and has a standard ‘GoPro’ mount at the bottom. On the top is a cold shoe to hold a light, or microphone. It’s a fab way of holding everything together.
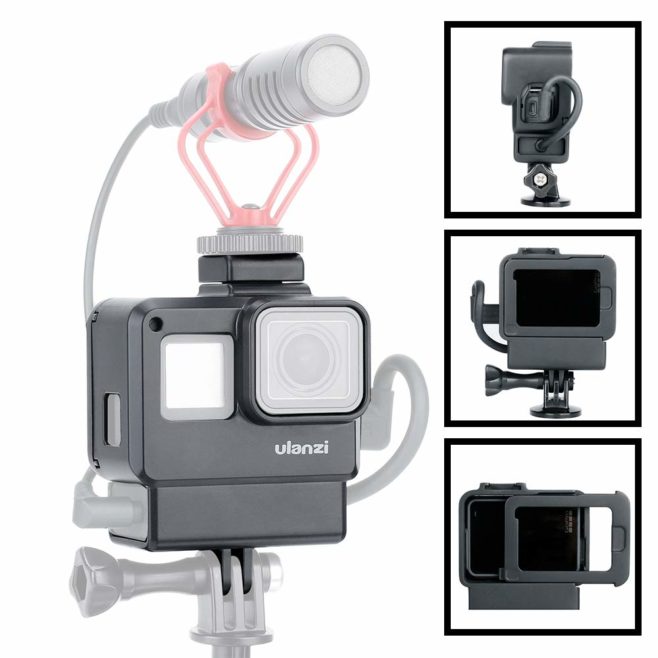
Generally, if I’m using it, the light goes in the cold shoe mount – which leads me on to..
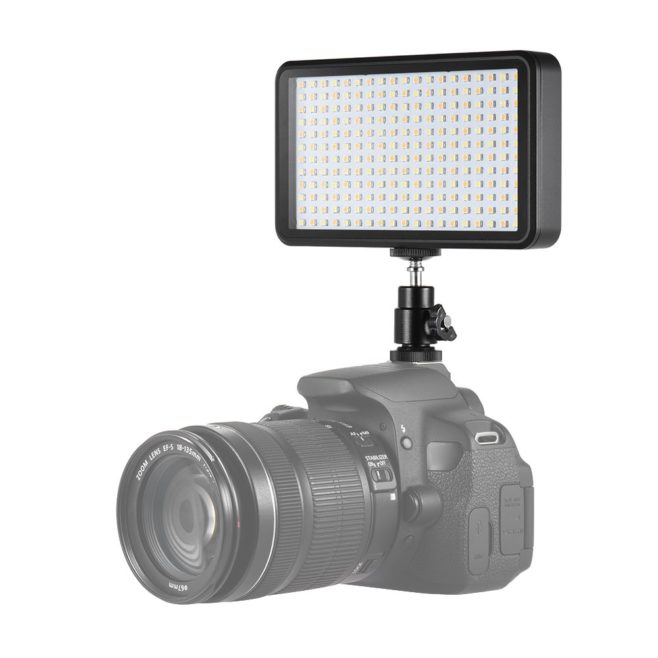
5 – The Light – Andoer Video Led Light Dimmable
This was recommended to me by Marcus of Ride & Park Media. He’s one of the most talented cameramen I know, and he uses these lights for filming. The Andoer Video Led Light Dimmable is FAB, it’s not too heavy and is dual colour light, so half the LEDs are bright white, and the others are a warmer white. There are dials to adjust the levels of both, so you can get a good white balance. When I was shooting last year with an LED light that was made up of bright white LEDs I looked washed out and pale. The light doesn’t come with batteries, so I got these ones.
It’s a super cheap light that really packs a punch, I’ve only used it on some of the lower brightness levels because it can get REALLY bright.
All of this gear needs to be mounted somehow, this leads me on to the final item..
6 – The Mount – JOBY GorillaPod 3K Kit and Rig Upgrade
So this is actually TWO items – the first is the Joby JB01507-BWW GorillaPod 3K Kit and the Joby GorillaPod Rig Upgrade. The Joby GorillaPod 3K Kit is this item –
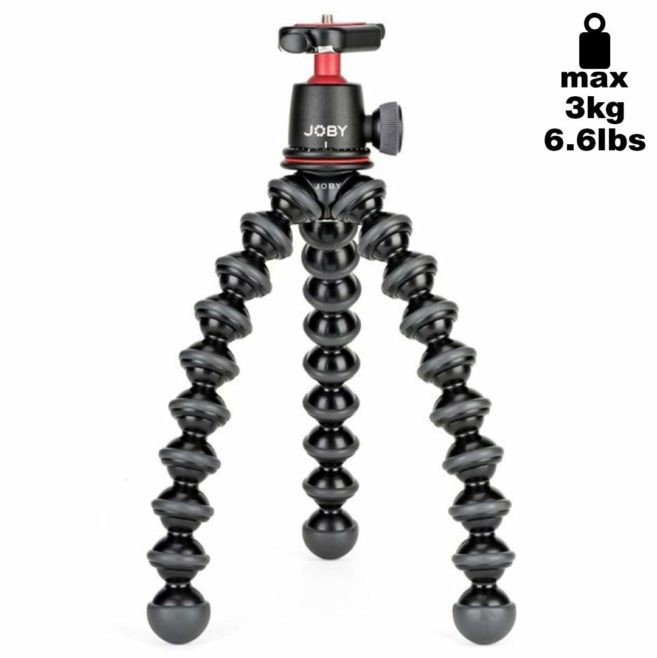
The 3 legs of the GorillaPod are flexible, so you can actually wrap them around things to hold the camera in position, or splay them apart to make a mini tripod. Often I’ll have them all straight and use it as a tiny selfie stick, for self filming. There are different versions of the GorillaPod, I have this one because I sometimes use it for my DSLR, so it needs to hold the weight of that. I like that it can quickly be changed into a tripod, it’s handy when I sit down, I can just plonk it on the table or floor.
The Joby GorillaPod Rig Upgrade part is this –
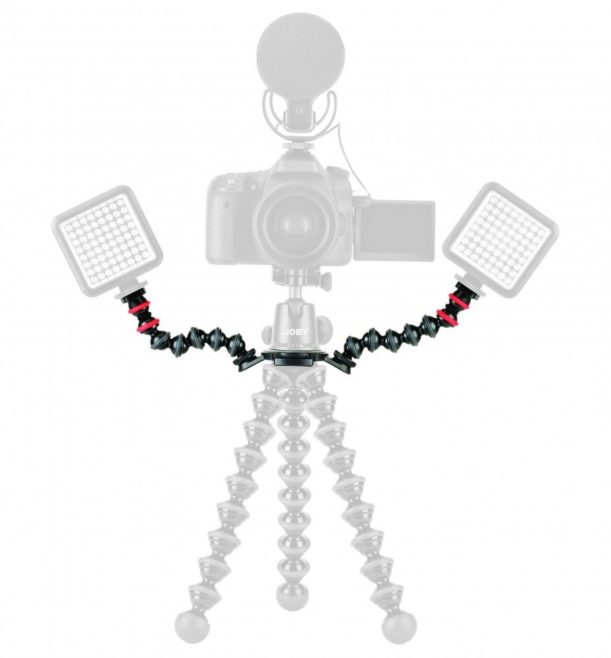
It’s essentially an adaptor that fits between the head and the legs. You can screw two additional arms into it, so I often just use one to hold the Microphone. You could have a DSLR on the GorillaPod, and a GoPro on the arm filming reverse angle footage. It just adds a bit of flexibility to your rig. When you’re not using the arms, you can just unscrew them, and leave the adaptor plate in situ.
The only thing that’s missing that I occasionally use is a quick release plate. This goes between the GorillaPod and the Camera Mount to allow me to pack away the rig quickly. I have one of these, and it does the job brilliantly.
So, that’s it, my out and about vlogging setup! It’s certainly evolved, and when I work out how much it’s all worth, it’s actually quite a bit. However, it’s all modular, you can buy a bit here and there and spread the cost. The biggest investment is the GoPro, and the rest are lower cost items. You might not need an external microphone immediately, so that, and the adaptor can be crossed off the list. There are different / cheaper cameras out there, but, especially when you’re shooting with an action camera, you need good stabilisation. A gimbal will help, but that’s another expense, another set of batteries to charge etc. I like the Hypersmooth in the GoPro HERO7 (and 8!)
Hopefully, that will help you, and if you’ve got any questions, drop me a message, or leave a comment.
- 1
- 2

Pingback: Tips for Going Back to College as an Entrepreneur - Kip Hakes